The Ultimate Guide to Drywall Edmonton Solutions
Wiki Article
The Ultimate Step-by-Step Overview to Drywall Installment: From Prep to Paint
Drywall installation is an essential step in any type of building and construction or renovation job, and it needs careful focus to information and accurate implementation. In this comprehensive guide, we will certainly walk you via each step of the process, from the initial prep work to the final paint. From collecting the necessary tools and materials to determining and reducing the drywall panels, we will certainly give you with clear and succinct instructions to guarantee a successful installation. That's not all-- we will also cover the essential actions of safeguarding the panels, finishing the surface areas, and achieving a perfect paint job. So, whether you're a seasoned DIY lover or a beginner homeowner, this overview is your best resource for attaining professional results.
Gather Necessary Tools and Materials
To begin the drywall installment procedure, it is necessary to gather all the required tools and products in a professional way. Having the right devices and products not only makes certain a reliable and smooth installation however likewise adds to the total quality and sturdiness of the ended up project.This will certainly allow you to cut the drywall sheets to the proper size, lessening waste. An utility knife with sharp blades is important for clean and specific cuts.
Next, you will need a cordless drill or screw weapon to secure the drywall sheets to the studs. Make certain to have a sufficient number of drywall screws available. These screws must be long sufficient to permeate the drywall and safely anchor it to the studs.
Various other vital tools consist of a drywall lift or a number of helping hands to aid with positioning and holding the drywall sheets in location. A drywall T-square can be practical for marking reducing lines, while a rasp or fining sand block will enable you to smooth any harsh sides.
Finally, collect all the essential safety tools, such as shatterproof glass, handwear covers, and a dirt mask, to protect on your own throughout the setup process.
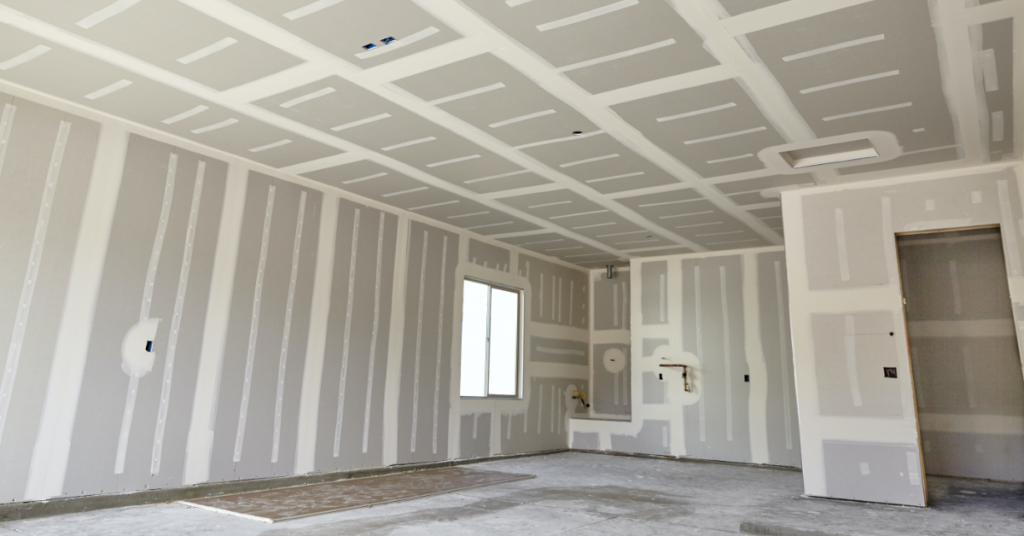
Prepare the Workspace
Prior to starting the drywall installation procedure, it is critical to properly prepare the workplace to guarantee a smooth and efficient setup. This step is necessary as it sets the structure for the entire job, making it possible for the installment to proceed perfectly.To begin, it is necessary to get rid of the job area of any furnishings, decorations, or various other products that might obstruct the installment process. This consists of removing wall surface hangings, covering furnishings, and securing the floorings with ground cloth or plastic sheets. Furthermore, ensure that the location is well-ventilated by opening up windows or using fans to stop the buildup of dirt and fumes.
Next, check the wall surfaces and ceilings for any existing damages or irregularities. Deal with any type of issues such as cracks, openings, or unequal surface areas before proceeding with the setup. This might entail patching up openings, fining sand down harsh locations, or using a skim coat to even out the surface area.
Last but not least, step and mark the design of the drywall sheets on the ceilings and walls. This will serve as a guide during the setup process and help guarantee exact placement of the panels (drywall installation). Consider any type of electrical outlets, switches, or other components that might need unique focus
Measure and Cut the Drywall Panels
Accurate cuts and precise dimensions are necessary when functioning with drywall panels during the installment process. Prior to reducing the drywall, it is important to gauge the measurements of the location where the panels will certainly be installed. Utilize a determining tape to figure out the elevation and width of each section, and see to it to make up any kind of electrical outlets or components that might require custom cuts.Once the measurements are taken, transfer them onto the drywall panels utilizing a pencil or marking tool. Double-check the dimensions to make sure precision prior to waging the reducing process. It is recommended to use a T-square or straight side to develop straight lines for reducing.
Keep in mind to put on safety and security goggles and dust masks when cutting drywall to secure yourself from debris (drywall installation). In addition, it is recommended to have someone help you in holding the panels throughout the cutting procedure to ensure security and accuracy
Install and Secure the Drywall Panels
Correct installation and protected add-on of the drywall panels is critical for a sturdy and successful coating. To start, thoroughly raise the drywall panel into location, guaranteeing it straightens with the marked standards on the wall surface. Make use of a drywall lift or enlist the assistance of an additional individual to hold the panel ready while you safeguard it. Beginning with one corner, insert drywall screws into the panel, driving them with the drywall and right into the wall surface studs. Be sure to space the screws evenly, roughly every 16 inches along the sides and every 12 inches in the. It is necessary to stay clear of over-tightening the screws, as this can create the drywall to crack or damage. Repeat this process for each panel, guaranteeing they fit firmly with each other with no gaps. Once all read the full info here the panels are installed, check the surface area for any type of extending blemishes or screws. Pierce or make use of a screwdriver to sink any kind of sticking out screws a little listed below the surface. Apply drywall joint substance to cover the seams between the panels and let it completely dry totally prior to continuing to the next action.
Complete and Repaint the Drywall Surfaces
To accomplish a polished and expert finish, the following action after setting up and protecting the drywall panels is to thoroughly end up and paint the drywall surface areas. Finishing the drywall entails several steps to make certain a smooth and seamless look. First, any type of noticeable seams or joints between the drywall panels should be covered with joint compound and tape. This substance is used to the joints, smoothed out, and left to dry. As soon as dry, it is sanded down to create a seamless surface area. Next, any kind of imperfections or unequal locations on the drywall are filled up with joint substance and fined sand down until smooth. After the drywall is appropriately finished, it is time to repaint. Prior to paint, it is necessary to prime the drywall surface areas to make certain correct adhesion and a smooth coating. Once the primer is completely dry, the drywall can be painted using a roller or brush, depending upon the preferred surface. Numerous layers might be essential to attain the desired color and coverage. It is very important to enable each coat to dry before using the next. Finally, once the paint is completely dry, the drywall surface areas prepare to be taken pleasure in.Final Thought

From gathering the needed devices and materials to determining and reducing the drywall panels, we will supply you with clear and succinct guidelines to ensure an effective installment.Accurate cuts and exact measurements are essential when working with drywall panels throughout the setup process.Correct installment and safe and secure accessory of the drywall panels is crucial for a durable and effective finish. Starting from one corner, insert drywall screws image source right into the panel, driving them with the drywall and right into the wall studs.To achieve a refined and specialist finish, the next action after setting up and safeguarding the drywall panels is to very carefully end up and repaint the drywall surface areas.
Report this wiki page